 (Photo by Zen droogie Dannon Raith. With his cell phone. Yeah, he's unfair that way.)
(See this post for an exposition of the art of feeding a sesshin.)

(Seen it at least half a dozen times; twice at this very spot.)
 (I just uploaded a hermitcraft article last week, but a reader recently asked about sourdough starter, so I'll go ahead and answer this week.)
"Sourdough starter" was synonymous with yeast here in western North America before the concentrated item appeared in stores. Elsewhere it was called leavings, scrapings, or spook yeast, or just "yeast", for it was all we had for that in those days. Witness Henry David Thoreau, hermit and Walden author, who had to hike to the village bakery to procure "yeast". There he was sold a living batter, susceptible to being scalded to death in overhot water, that raised bread primarily by chemical reaction with sal (baking) soda.
You tell me what that was.
The paste those Concord bakers doled out is properly called sourdough starter, as "sourdough" by itself usually describes the kneeded dough and its products. But in practice, the starter is also often called "sourdough", and this can confuse beginners. For that reason, I will henceforward identify the yeast culture by the word "starter".
SOURDOUGH STARTER
You will need:
Potatoes
Water
White flour (not whole wheat; see below)
A serviceable pot
Such a pot must be nonreactive (that is, not metal) and watertight. Beyond that, anything will do. The best ones are lidded, wide-mouthed for easy scooping in and out, and clear, so you can monitor the health of the occupants. Mine is a one-quart plastic jar that once held mixed nuts.
Pot secured, proceed as follows:
1. Peel, quarter, and boil the potatoes.
2. Strain, reserving the
water.
3. Eat the potatoes.
4. Stir up a batter with the flour and potato water. It should resemble slightly-too-thick pancake batter.
5. Dump this medium into your pot. Leave the lid off to welcome passing yeast.
Within 24 to 48 hours the starter will begin, slowly at first and then with gusto, to bubble and work. At full élan it will have a healthy, yeasty, fermented smell.
Sourdough starter is a living thing, with wants and needs and specific rights under federal and provincial law. To be precise, it's a community of microbes – hence the term "culture" – that eat various sugars and fart out carbonic gas. (Sorry; you asked.) The sugars come from the ground grains you put back in the pot each time you use some. Keep this up indefinitely and your little sea monkey civilisation will thrive indefinitely, humming happily along on the kitchen counter, where you will bond with it as with houseplants, pets, and children. The longer it survives, the better it will get; new yeasts will happen by and set up shop, resulting in more active, versatile starter.
In any case, the starter must be fed at least once a week, even if that means throwing some starter out to make room. (This fact helps get me up and baking when I otherwise might slough off, because I hate wasting food.) The more you use it, the more you feed it, and the healthier it becomes.
If however your starter goes too long without recycling, the yeast will suffer moral decay and the pot will be invaded by either a red bacterium or a grey mildew. They're both harmless, but they taste bad. To get rid of them, collect a teaspoon of the cleanest starter you can rescue, use it to start a small temporary pot on the side, and throw the rest out. Then sterilise the pot (a thorough washing, followed by an overnight soak in a bleach solution), mix up a fresh batter, and inoculate it with the reserved starter. The yeast will then handily out-compete any intruders that come back aboard with it.
It's also good to feed other grains from time to time, to encourage a diversity of yeasts. You can stir in whole wheat flour now and then, but not too often, because it's full of oils that go rancid over time. Other effective treatments include corn flour (fine-ground cornmeal), masa or powdered oatmeal (not too much of either), and mashed rice or rice flour.
So this oughta get you started. (Get it?) If you're looking for a good first project, you might try hermit bread. It's an easy enough recipe to build confidence, and a hard enough one to teach you a few things. And it's where I started, too.
 I'm not a big incense guy. Some Buddhists are. They like to set up an exotic Asian vibe, and incense is one of the foreign accoutrements they amass on their borders to accomplish that. As Thich Nhat Hanh says, these practitioners "make a lot of smoke".
Meanwhile, I'm a hermit, and rama-lama-ding-dong irks me. But I have to admit, in many ways it can support valid practice.
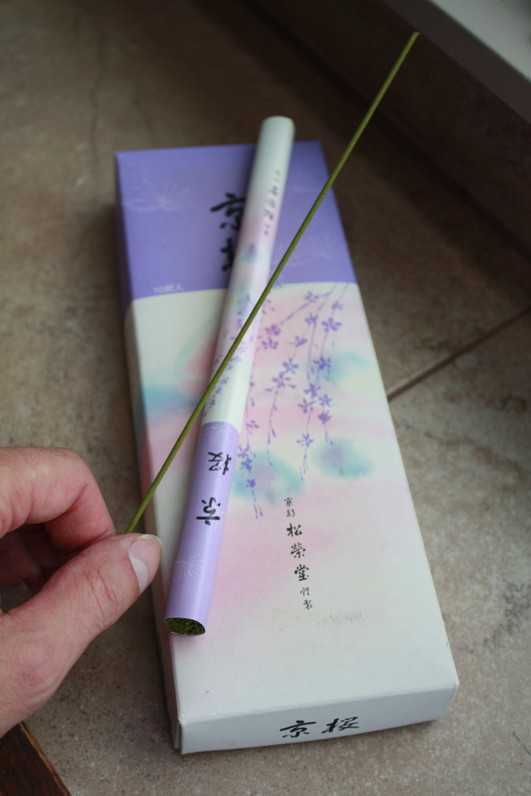
At the start of my vocation I lived upstairs from two incessant smokers. Their ceiling/my floor proved dismayingly porous, and I couldn't escape the stench even in my own home. Since I had recently embarked on a Zen path, my counter-schemes naturally turned to fine Japanese temple incense. It's expensive, but it doesn't stink up the place like the cheap stuff, and, as I happily learned, its pleasant unobtrusiveness doesn't stop it getting all bushido on smokers' arses.
As a side benefit, the fact that I was saturating my living quarters with temple incense during the founding months of my practice imprinted it, Pavlov-style, on my neural net. So now the smell of good incense calms me and puts me in practice mind. Which is exactly how cœnobites justify their incense fetish.
Goddam cœnobites.
Anyway, I needed an incense burner. Did I mention I don't like the thing Chögyam Trungpa called "spiritual materialism"? And on a Scottish note, commercial burners tend to be wasteful, because the end of the stick that's stuck in their hole or sand doesn't burn. Hey, if I'm gonna blow seventy dollars on smell, I'm wringing every last penny back out of it.
And so I invented this. It works. It burns the stick down to one or two millimetres. And it's bindle technology, which is the electrical opposite of pretence.
You will need:
1. Two clothespins, the kind whose wooden legs are held together by a steel spring.
2. Glue.
3. An empty sardine tin. (I like the long skinny tins that kippers come in, because they catch all the ash when burning a full stick.)
4. A fine-toothed saw, such as a coping saw or hacksaw
Optional: paint or stain; sandpaper; a small triangular file.
1. Saw the "lips" off one of the clothespins, angling the cuts about 45 degrees toward the tail, making a pointed business end. (See illustrations; you can also accomplish this by rubbing the clothespin on coarse sandpaper or holding it against a disc sander.) Without this, the incense stick will snuff out prematurely.
2. Next, take the second clothespin and saw about half an inch from the end of one of its legs. Then turn that bit narrow end forward, and glue it to the inside of the end of one leg on the clip. (See illustrations.) This forms a cleat that will hook over the rim of the tin and hold the clip in place. Clamp the glued bit down with the donor clothespin until it dries.
3. Inscribe a shallow groove in the middle of the biting surface of the jaws, to keep the round incense sticks straight in the jaws and prevent them from rolling out. A small triangular file is handy for this. In any case don't cut the notch too deep or the clip won't hold the stick. A good scratch is all that's needed.
Optional: clean up the sawn surfaces with fine sandpaper, and paint or stain the clip so it doesn't look so much like a clothespin. If that's a problem. (The clip in the photos was stained with outdoor trinity tar.)
To use, clamp an incense stick between the clip's jaws. Fix the clip to the tin by hooking its cleated leg over the rim of the tin and stepping the uncleated leg in the angle formed where the tin's side meets the bottom. (Photos again.) Ideally the installed stick should lean about 45 degrees over the tin. If the fit is good and secure, you may have to flex the clip's spring a bit to get it mounted. If it's too loose, consider modifying the cleat, or try a different size clothespin.
This incense burner is easily made, lightweight, and cheap. You could conceivably parlay your artistic skills into a pretty fancy model, if you painted up the tin. But it would be hard to make it very expensive, even at that. Either way, I'll confess to becoming very attached to mine. When somebody tossed out the first one I made back in the day, I was truly raked off.
So now I hide this one.
 (...that has such things in it.)


