Showing posts with label bindle technology. Show all posts

Thursday, 13 April 2023

Hermitcraft: Towel Zafu

When I first became a hermit monk I had no zafu, so I sat on a sofa cushion. That got me off the ground – no pun intended – but was bulky, interfered with my thighs, and couldn't be transported on road trips. So a few months in, having researched zafu alternatives on the Enlightenment Super-Path, I upgraded to this. Since it took some time to perfect, I thought it might help others to share my experience here.

The suggestion I found online was "use rolled-up towels". This proved underwhelming for a few reasons, worst of which is that bath towels unroll readily beneath a sitter.

So I rolled the three thick terrycloth bath towels again, as tight as I could – painfully so – and bound them with jute twine. That prevented them migrating in the cardinal directions. It did not, however, stop them from telescoping out of integrity and firmness.

So I cut them loose again, fluffed them up, and started over. This time, after layering them on the floor, I cut two lengths of jute about a foot longer than the towels were wide and laid them width-wise across the stack, about four inches from the end. Then I cut four new jute bindings and tore up my knuckles hard-rolling them again.

After retying as before, I knotted each lengthwise string on opposite sides of the roll. (Be sure to weave them over and under the four shorter bindings before tying, to dissuade all from wandering. Also, I suspect four long strings would do even better.)

This was major improvement. But the roll still mushed down quickly, no matter how hard I rolled and tied it, and contact with the floor and my backside caused the bindings to wander and fray, and even untied the knots.

So… again with the unrolling, fluffing, knuckle-grinding, and tying. But this time I also made a drawstring cover to protect the bindings. (The velours I used has velvety knap that grips mat and meditation trousers and reduces travel while sitting.) For maximum structural support, I cut it so tight I could barely get it on. And because the fabric was under constant stress, both from me and the resentful towels inside, I double-sewed all seams and took other sailmaker measures to toughen them up.

After a lot of jerking, shoving, and swearing, I managed to force this cover on. (Pro tips: push the terrycloth down with two fingers and pull the cover up over them a half-inch with the other hand. Then turn the roll three inches and repeat, continuing patiently till you've got the cover on. A quicker trick is to tape collars cut from round plastic bottles around the roll and remove them as you progress.)

The result served me daily for a year, until I received the buckwheat zafu I now use, a birthday gift from my mom. (And during my 100 days I sat on a roll of closed-cell foam, which worked out somewhat better than the towel roll.) But I still keep the old bolster around, just in case; for example when passing my zafu and/or seiza bench to people who've asked me to teach them how to meditate. It's also a memento of the determination I brought to this pursuit, and the wonderful sense of growth and success in that early practice.

To be sure, even a well-built towel zafu isn't the equivalent of a real one; it's heavy and hard, and needs regular rebuilding – say, every two months or so – to restore loft and elasticity and repair bindings that come adrift. Also at those times, launder or rotate out the towels, which tend to compress and become stiff and thin with service. If at all possible, machine-dry before rebinding, because hang-dried towels don't recover their nap until they dry somebody.

The bursitis I've since developed would axe my old friend for twice-daily, hour-long sits – a problem I also had, though not as severely, with my closed-cell foam on the mountain.

But at the time this old bindle technology was just the ticket. I sat on it daily, travelled with it, and built a solid monastic practice on it. Given that store-bought options are expensive, this can get you into Zen right away, even if you don't have much money.

Deep bow to all who enter the Path, by whatever trailhead.

Thursday, 21 January 2021

Comments are back

Well, I finally did it. I dumped the IntenseDebate comments widget.

It was a hard decision, for several reasons. Worst of which was losing full nine years of reader comments.

As I always say, my intrepid half-dozen readers make up in quality what they lack in quantity. As a result, there was almost a decade of thoughtful, supportive, and informative participation locked up in that abandonware, that couldn't be transferred to any other host. Dumping IDC meant losing all of that.

But keeping it meant many couldn't comment in the first place; in some environments there wasn't even a "Comments" link available. And finding a back door was fiddly and time consuming, when it was possible at all. The glitch dogged me as often as readers, who had been gently complaining about it for some time.

The lesson here is, never use a third-party feature for content. Off-site upgrades are inevitably deserted by their inventors, leaving their users recourse-free. So only use host-native resources for core services.

There were a few other issues. Worst was that I'd lost the ability to delete spam or abuse. Fortunately neither have been a problem on Rusty Ring, but this is still the Internet. It was just a matter of time.

Not that IDC was short of attractions, of course. Most notably it allowed readers to edit their comments. No matter how vigilantly you copyedit, the instant you post that paragraph all manner of typos and missteps bob to the surface. Therefore you need the power to fix it afterward. But sadly, Blogger's crude comment interface, with its attendant lack of up-thumb (they can keep the down-) and ugly typeface, robs readers even of the ability to delete a comment, let alone change it.

In other words, it's worse than Twitter.

And "worse than Twitter" is grounds to dump anything.

But I'll tell you what that rock-knocking Internet v.2 Blogger comment utility does allow you to do: it lets you comment at all, which IDC, for all its elegance and convenience, was no longer doing. And since it's built in to Blogger, it's unlikely to simply go numb one day, unless the entire platform does.

The good news is that I immediately heard from readers who had been chafing at the inability to continue our conversations – and a few new ones who had never been able to start one in the first place. In less than a week I've racked up more comments than I've had at any week in the recent past.

So welcome back, friends! If it hadn't been for that lost material I'd've done this a long time ago. My deepest apologies to those whose contributions got poofed into the ether at a stroke of my keyboard. (Make that several; hoovering out all of the IDC code and troubleshooting the result took the better part of an evening.) I look forward to seeing you once again in Rusty Ring's new/old bindle-technology comments.

(And for those wondering, yes, I'm still planning to move this blog to an entirely new host. It's just that I've got too much going on at the moment, what with my mom's in-home hospice and a few other things, to take it on yet.)


(Photo of a reader comment scratched in Robert Burns's Commonplace Book 1783 – 1785 courtesy of Wikimedia Commons and a generous photographer.)

Thursday, 28 July 2016

Hermitcraft: Bindle Cookset

For some time now I've been designing a bindle cookset (and by "designing" I mean thinking about it, for example when I'm supposed to be meditating), and I thought I'd share my process to date. The project has proven more difficult than one might guess, given the low level of technology.

When I was a kid, my dad had a mess kit he'd made out of old food tins. As I recall, it consisted of a small pot, maybe a pint in capacity, nested inside a larger one. Both had lids with wooden knobs made at my dad's bench, and coat hanger bales. In the middle was a cup made from a pineapple tin. Try as I might, I can't remember how he attached its handle.

But it's the lids that really make the stunt difficult now; in my dad's time, the food tins that have plastic covers in our day, had fitted metal ones that made fine pot lids. Filling this deficiency is a challenge, though some of the new "safe" can openers are promising: they cut the top of the lip rather than the bottom of it or the inside, leaving a lid that mates back in place.

Nor has the Internet – which generally solves such problems for me – been very helpful. Most of the short list of examples I found aren't worthy of mention; they're tiny or weirdly-shaped ultralight gear, and/or have no lid, rendering them unusable for practical cookery.

But this week I found a good one. Fittingly, it's made by a metalsmith, and features a (very nifty) cup that requires specialised skills to fashion. But the pot is within reach of even a clumsy tinbanger like me, and the sort of thing any self-respecting hermit would be proud to cook in.

So without further ado I'll send you off to see it. Note how he's solved the lid problem. I considered a similar approach, and am gratified to see I wasn't completely dim, although his design is much better than what I was imagining. (His wok, though beyond my needs, is also terrific.)

Anyway, have a look. It's a great job. Be sure to scroll down for details.

PaleoPlanet > Metal Working > Tin Can Cookware
http://paleoplanet69529.yuku.com/topic/49489/Tin-Can-Cookware


(Photo courtesy of the fellow who made the kit, Photobucket, and PaleoPlanet.)

Thursday, 4 June 2015

Hermitcraft: Bindle Oryoki Set

Though the word translates as "just enough", oryoki has grown to mind-numbing complexity in Zen monasteries, where every second of every meal is carefully choreographed. Beginners often view this mealtime ritual as an onerous pack of made-up fuss, but in fact it's the most efficient way to get lots of people through a full-course meal and back to work. (Once everyone's mastered it, anyway.)

Centrepiece of the ceremony is the monk's dining set, which consists of three or more graduated bowls (details vary from house to house) nested and knotted in a large napkin, along with a range of utensils. Diners start and end each meal in the same position: seated before a neat, perfectly-packed oryoki set. Watching a well-trained sangha perform this bewildering kata, from opening through serving, eating, cleaning, and closing, is a memorable experience. (Participating in it is even better. As neurotic as it sounds, oryoki is curiously satisfying. I've never met a monk who doesn't consider it one of the most powerful – maybe the most powerful – liturgies in the monastic day.)

Having said that, I didn't intend to observe oryoki when I began my 100 Days on the Mountain; too much falderal for a man alone. But I quickly realised that it's even more necessary in the woods than in the artificial forest of institutional Zen. When you're sitting lotus on the ground, with only your lap for a table, you're forever reversing tea on yourself, scuffing dirt into your rice, knocking over the water bottle… those first meals without oryoki were a chaotic, wasteful fiasco. Fortunately I had the basic elements of a bowl set with me, and after some intensive assembly and invention, managed to reduce accidents to virtually none. (Absolutely none, if you subtract mishaps due to neglect of the forms.)

Out in the Red Dust World, storebought oryoki sets are often lovely works of art… and the money needed to buy some of them could keep their lacquerware Buddha bowls full for many years. By contrast, the kit you see here serves admirably for "bindle oryoki": an eremitical version of "just enough" that's, like, just enough. It includes only two bowls: a Buddha bowl for rice and beans, and a smaller one for tea; only two cloths (wrapper/wiper and lap cloth/spoon case); and – most heretical of all – a single utensil (still folded in the lap cloth in the photo at left). Fact is, forest practice doesn't require anything but a spoon. It'll put rice in your bowl, take rice out of your bowl, and scrape the bowl clean afterward. Mission accomplished.

All of this, properly (make that, obsessively) cleaned, wrapped, and knotted, fits nicely in my little tea kettle, and then both of those in my larger rice kettle.

The elements, with approximate prices new, in US dollars, are:

2 melamine bowls, $7.50
2 bandana handkerchiefs, $5.00
1 wooden mixing spoon, suitably modified and finished in trinity tar, $5.00

Total cost: less than $20.00. If that's still too much, you can buy the bowls at a dollar store or garage sale; make the cloths from old sheets or shirts; and whittle the spoon out of scrap wood. In fact, with due diligence, you could probably reduce the total investment to $0.00.

The spoon is the only component that requires careful consideration. I actually used an old stainless steel spoon on the mountain. Metal is tough and holds an edge, and so it scrapes the bowl well at meal's end. Also, a heat-proof utensil is handy; you never know what you might need to do with it. On the other hand, Japanese tradition favours the natural beauty of wood, and appreciates the fact that a wooden spoon makes less noise in the mouth. (One of the many neuroses of monastery etiquette.) This is germane to the forest as well, where a monk must keep the lowest possible profile for tactical reasons. Wooden implements also are non-reflective, and don't ring or sink if dropped.

The kettles came from an ancient camping cookset my parents bought in the early 60s with S&H Green Stamps. You can't get quality like that today – at least not at the price – but sharp eyes at the Good Value Army, or careful crafting of tin cans (for further consideration see this post), could get you into a serviceable pair for very little.

One way or the other, this set-up fed me with radiant adequacy for 100 days. I'm sure it'll do as much for you.

May each of us carry our bowls through this world with mindful resolve.


Thursday, 6 February 2014

Hermitcraft: Bells

Regular readers of this blog know that I generally eschew material attachments in Zen practice. We humans have a tendency to pile up insignia and trophies to justify ourselves to others, and that erodes practice, often to the point of replacing it. Thus Zenners accumulate zafus and rakusus and statues and incense and any number of other gewgaws – often very expensive ones – for bling, or to create an ambiance.

The first is questionable, the second legitimate if mindful. (An ambiance of what?) Early in my practice I determined that – rama-lama-ding-dong aside – a bell is useful in meditation. I ring mine once when I start and once when I finish; sometimes in between, to help concentration. And sometimes I just strike it in passing, to reaffirm my commitment. Like incense it's a Pavlovian prompt (literally, in this case) that establishes or re-establishes a monastic mindset.

However, I have issues with spending large sums of cash on fancy gong-type paraphernalia. The stuff sounds great, I admit; a high-quality singing bowl can ring forever. If someone wanted to get rid of one, I'd take it. But you can buy a lot of rice on the cost of that perennially empty bowl.

So instead, I upcycle free or nearly-free non-bells that ring well in spite of themselves. First was a length of brass pipe. It had good tone, but was hard to suspend. I then upgraded to a small brass bell cannibalised from an old telephone (see photo above). It rests on a salvaged scrap of ash, finished with trinity tar, and I beat it with a large nail. It's cheap, portable, and dings expertly, though not so loudly that it's obtrusive to others.

Other times I use a Revere Ware saucepan lid (photo below), sounded with an old toy xylophone beater. (Wooden spoons work well too.) Revere Ware products are often quite musical. Others may ring as sweetly, but lack that broad flat Revere Ware knob that makes a perfect gong base. In any case, if you don't already own a serviceable piece, head down to the Good Value Army and pluck all the pot lids with your thumbnail. Chances are you'll find a good one.

Saw blades and metal mixing bowls can also do bell duty if properly suspended. Old doorbells – better yet, door chimes – are another good source of dingstock, as are wind chimes and some types of glassware. Old garden bells can be had cheap at garage sales, then mounted and dung. And few things peal as beautifully as those gas-bottle bells you see around. They fetch usurious prices in garden and Buddhist supply stores, but are nothing more than worn-out propane tanks cut in half. If you or someone you know can do that (cutting torch? angle grinder?) : Keisu City.

Because anything that bongs when you bump it is a bell.


Wednesday, 30 October 2013

Thursday, 5 September 2013

Hermitcraft: Shelters For Forest Practice

The interior of Thoreaus original cabin replica, Walden Pond

Thoreau's cabin at Walden
My decision to live in a tiny tent during my 100 Days on the Mountain, rather than more comfortable quarters, was largely influenced by my determination to live in the forest, rather than just near it. (It was also my only option when I thought I'd have to sit on public land.) But in the doing I discovered that a cabin is necessary to do this right; it spares you practice-robbing work and health risks. Let's be clear: by "cabin", I mean four walls and a roof. A shepherd's trailer; a wall tent; a tool shed; a plywood hut; eight by twelve of simple headroom. More, and you're no longer in the woods.

• Your shelter should have as many windows as possible, for morale and to keep you "in-frame". A broad, wrap-around opening in the walls, screened and shuttered, is perfect. A roofed porch or awning is also useful.

• As I learned, a woodstove can be invaluable in northern climes, even in summer. Otherwise it can be impossible to stay clean; you can't dry your clothes and it's difficult to bathe through cold and rainy weeks. The small portable models they make for hunters are fine.

Shepherd's trailers
• Since cooking on a woodstove is an arcane skill, uncomfortable in warm weather and time-consuming, you'll need a camp stove as well. A single propane or butane burner is entirely adequate and can be used indoors with adequate ventilation.

• Take pains to secure a comfortable cot and a good pillow; unbroken sleep is vital to effective practice.

• You will also need a table and chair. Lack of comfortable seating is a technique governments use to torture prisoners. They do not become enlightened. (Mandarin or convict.)

• Install shelves or cabinets, and a variety of hooks, for storage.

Simple garden shed
A corrugated metal roof and/or sides makes for a fast and solid building, fine for one-season use. A corrugated plastic roof, light to carry and cheap to buy, also acts as a skylight. A wood floor, while not necessary, makes staying clean a lot easier. (If using a tent, consider a plywood platform, a sewn-in floor, or at least a heavy canvas ground cloth.)

Finally, it's a good idea to make whatever structure you choose as neat as possible. People are already suspicious of us. You don't want to give those Ted Kaczynski references any free hand.

Basically, you want something that's dirt-basic but a whole lot cleaner. Then raise the Bandana Ensign in the dooryard and bust some suffering!

UPDATE, 19 June 2014: see my post on Kamo no Chômei's classic hermit hut.

UPDATE, 30 July 2015: Swedish architect draws designer hermit digs! Read about it here.

(Adapted from 100 Days on the Mountain, copyright RK Henderson. Photos: Thoreau's cabin (Tom Stohlman) and shepherd's trailers (John Shortland) courtesy of Wikimedia Commons; simple garden shed from Sheddiy.com.)

Thursday, 3 January 2013

Hermitcraft: Incense Burner

I'm not a big incense guy. Some Buddhists are. They like to set up an exotic Asian vibe, and incense is one of the foreign accoutrements they amass on their borders to accomplish that. As Thich Nhat Hanh says, these practitioners "make a lot of smoke".

Meanwhile, I'm a hermit, and rama-lama-ding-dong irks me. But I have to admit, in many ways it can support valid practice.

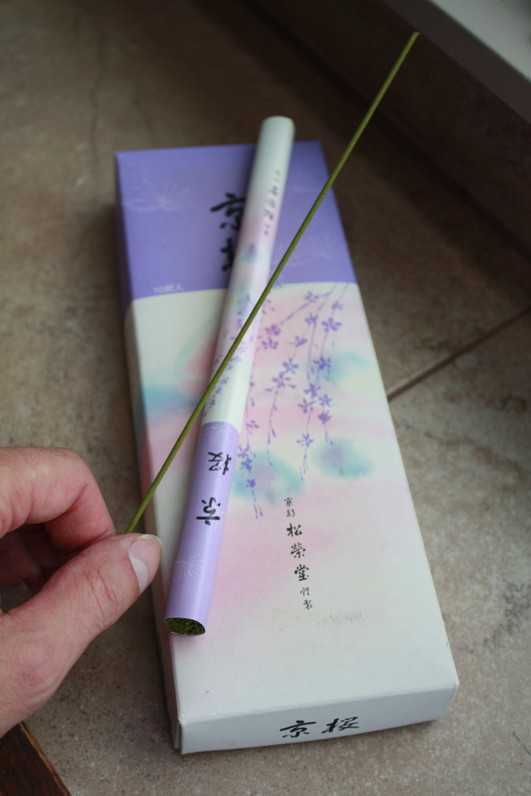
At the start of my vocation I lived upstairs from two incessant smokers. Their ceiling/my floor proved dismayingly porous, and I couldn't escape the stench even in my own home. Since I had recently embarked on a Zen path, my counter-schemes naturally turned to fine Japanese temple incense. It's expensive, but it doesn't stink up the place like the cheap stuff, and, as I happily learned, its pleasant unobtrusiveness doesn't stop it getting all bushido on smokers' arses.

As a side benefit, the fact that I was saturating my living quarters with temple incense during the founding months of my practice imprinted it, Pavlov-style, on my neural net. So now the smell of good incense calms me and puts me in practice mind. Which is exactly how cœnobites justify their incense fetish.

Goddam cœnobites.

Anyway, I needed an incense burner. Did I mention I don't like the thing Chögyam Trungpa called "spiritual materialism"? And on a Scottish note, commercial burners tend to be wasteful, because the end of the stick that's stuck in their hole or sand doesn't burn. Hey, if I'm gonna blow seventy dollars on smell, I'm wringing every last penny back out of it.

And so I invented this. It works. It burns the stick down to one or two millimetres. And it's bindle technology, which is the electrical opposite of pretence.

You will need:

1. Two clothespins, the kind whose wooden legs are held together by a steel spring.

2. Glue.

3. An empty sardine tin. (I like the long skinny tins that kippers come in, because they catch all the ash when
burning a full stick.)

4. A fine-toothed saw, such as a coping saw or hacksaw

Optional: paint or stain; sandpaper; a small triangular file.

1. Saw the "lips" off one of the clothespins, angling the cuts about 45 degrees toward the tail, making a pointed business end. (See illustrations; you can also accomplish this by rubbing the clothespin on coarse sandpaper or holding it against a disc sander.) Without this, the incense stick will snuff out prematurely.

2. Next, take the second clothespin and saw about half an inch from the end of one of its legs. Then turn that bit narrow end forward, and glue it to the inside of the end of one leg on the clip. (See illustrations.) This forms a cleat that will hook over the rim of the tin and hold the clip in place. Clamp the glued bit down with the donor clothespin until it dries.

3. Inscribe a shallow groove in the middle of the biting surface of the jaws, to keep the round incense sticks straight in the jaws and prevent them from rolling out. A small triangular file is handy for this. In any case don't cut the notch too deep or the clip won't hold the stick. A good scratch is all that's needed.

Optional: clean up the sawn surfaces with fine sandpaper, and paint or stain the clip so it doesn't look so much like a clothespin. If that's a problem. (The clip in the photos was stained with outdoor trinity tar.)

To use, clamp an incense stick between the clip's jaws. Fix the clip to the tin by hooking its cleated leg over the rim of the tin and stepping the uncleated leg in the angle formed where the tin's side meets the bottom. (Photos again.) Ideally the installed stick should lean about 45 degrees over the tin. If the fit is good and secure, you may have to flex the clip's spring a bit to get it mounted. If it's too loose, consider modifying the cleat, or try a different size clothespin.

This incense burner is easily made, lightweight, and cheap. You could conceivably parlay your artistic skills into a pretty fancy model, if you painted up the tin. But it would be hard to make it very expensive, even at that. Either way, I'll confess to becoming very attached to mine. When somebody tossed out the first one I made back in the day, I was truly raked off.

So now I hide this one.

Thursday, 5 July 2012

Hermitcraft: Candles

A few months ago I posted instructions for making your official Hermit Club rushlight, or candle lantern. That left you with a cheap, serviceable product that did not, however, throw any light, because I didn't explain how to make the candles that go inside. Today, I caulk that seam.

Chandlery is a complex art, demanding skill, experience, and money. Which is why I'm not sure this counts, because these candles are cheap, easy, and homely. (Bindle technology strikes again.) But they fit perfectly in a tin-can rushlight, and properly made, burn for about a month of sitting.

You will need:

Candle wax.
A large tin can.
A sauce pan.
A stove.
Boiling water.
An empty cardboard frozen orange juice can, the kind with metal ends.
Cotton wicking.
A hammer and a small nail.
Duck tape. (It is too duck tape. Don't tape ducts with it; you'll be fined back to the Stone Age.)
Two square sticks and a rubber band.

I find much of my wax on the beach (see photo, right); the fishing fleet uses it for something. The rest comes from dripping and remnants of previous candles, and recycled candles-of-fortune.

I don't care about colour, except I never melt green and red wax together, because the brownish-grey they become is literally nauseating. Also, the more colour in the pot, the lower and slower the candles will burn. (The colorant isn't inflammable.) So you will have to soften over-coloured wax by stirring in lamp oil – after taking the pot off the heat, of course. For the same reason, it's a good idea to whittle the "rind" off recyclable candles that are coloured only on the outside, before melting; that shell is pure colorant, and of no use to us.

For wicks you can buy the dedicated product from a craft store, or use heavy cotton butcher's twine right off the spool, or braid that ubiquitous small white cotton "kite string" parcel twine to the proper gauge. (My favourite option, because you can adjust the size by adding or subtracting strands. Plus it's cheap.)

The procedure:

1. Put chunks of wax in the tin can, place the can in the sauce pan, and fill the pan with boiling water to just shy of the point where the can would float.

2. Place the sauce pan over medium-low heat and keep an eye on it. Paraffin wax becomes paraffin paraffin when it melts. (That's kerosene to my American friends.) In other words, you're simmering a pan of lamp oil on your stove. You don't want it boiling, sloshing on the burner, or copping any kind of attitude.

3. While you're waiting for the wax to melt, poke a hole dead-centre of the juice can's metal bottom, using the hammer and nail. The hole should be just big enough to admit the wick; any larger, and leaks become an issue. Also, cut the juice can down about an inch and a half for optimum rushlight size. (For generic pillar candles, you can use the can uncut.)

4. Knot one end of the wicking, trim the knot close, and thread the string up through the hole. You may need to dip the unknotted end in wax first, to make it stiff. Cut the wicking off two or three inches longer than the final wick will be.

5. Duck tape the end very securely, because that stuff isn't even almost heat-proof. (See? Completely unusable for ductwork.) Use two strips, crossed and running halfway up the sides of the can, and burnish them down well all over the bottom and around the knot.

6. Rubber-band the two square sticks together at one end to make an elastic clamp. Pass the wick between its "jaws" and tighten it up so the wick remains secure and plumb in the mould. (Not enough tension and the wick will meander while the wax cools, causing the candle to perform poorly.)

7. Pour about an inch of wax in the bottom of the mould and let it cool for a few minutes. This helps prevent leaking from the wick hole. When the wax has thickened a little, fill up the mould and take the pan and melting can off the heat. Allow the candle to cool completely at room temperature, about three hours.

8. Because paraffin wax contracts as it solidifies, you will find a deep depression in the top of the cooled candle. Re-melt the remaining wax and fill it level again. When the topping-up has hardened, you can scrape off the knot with a sharp knife and pull the candle out by the wick. If it sticks, just tear away the cardboard.

If you find that your homemade candle consistently drowns (the flame burns very low, or goes out entirely), then your wick may not be big enough. (Give it a few chances; for some reason, performance can vary from sitting to sitting.) If it burns too high and threatens to burst the wax pool, the wick may need trimming. If that doesn't fix it, it's too big.

In either case, the solution is to melt the candle back down and mould another with a better wick. As the blend in your melting can changes, due to variations in the pigment content and hardness of added wax, you may need to adjust the gauge of your wicks. With time you'll develop a sixth sense for these things and seldom have to resort to repouring.

And there you are. A cheap candle, perfectly sized for your rushlight.

Thursday, 5 April 2012

Hermitcraft: Rushlight (Candle Lantern)

Every hermit needs a rushlight. It's a meditation candle, a trail light, and general illumination where there is no electricity. I made this one before I went into the woods last summer, and it served daily and well.

As you can see, this is bindle technology: a tin can with holes punched in. (I used a power drill for cleaner, more uniform holes.) Ordinarily you'd shift every other hole column up half a space, so that its holes are midway between those in adjacent columns. This maximises light and conserves metal strength. For even more strength, make the staggered holes smaller.

That said, you'll note that this rushlight has slits instead of staggered columns. I cut them with an angle grinder, thinking I'd get more light. And I did, but I probably won't do it again; the slit sometimes focuses a beam straight into my pupil when I meditate, forcing me either to endure it or break posture and poke the lantern with my monk stick. And a few minutes later it rotates back and lasers me again. A hole can only do this until the flame burns past it, but a slit can pester you all night.

Worse still is the metal lost; with ten full-length cut-outs, this rushlight crushes easily in my pack. The situation is not helped by the fact that both holes and slits go all the way to the bottom. This is overkill; both should stop about two inches up. The extras don't give much more light for the removed metal, and they leak wax that might otherwise extend candle life.

It's a fine design for home, though. The bottom tray is a candy tin cover I added after I came out of the woods, to catch run-outs. These aren't a disaster outdoors, though messy and wasteful, but unconfined dripping is a deal-breaker inside.

The tray also makes the rushlight much more stable when standing, which is otherwise a concern. The rubber feet (see photo below) were cut with a half-inch gouge from a tire I found on the beach, and attached with Gorilla Glue. They grip surfaces and eliminate marring. The tray does prevent me from stuffing the lantern into a pack pocket, but the detachable upgrade won't be a hard brainstorm.

I used hoarded notebook wire for the bail, because it's cheap, heatproof, and easily worked. The bail must be long enough to carry the light without burning your hand, and to hang without setting the support on fire. You'll also need a mesh cover (not pictured) outdoors to keep insects out. This is not just good karma; the dead will otherwise catch fire, inciting the chain reaction described in the next paragraph.

Possible complications include drowning wicks, blow-out, and worst of all, the Volcano of Atonement: molten wax breaks through the rim of the pool, cuts a channel that prevents a new one from forming, and the whole thing melts down in a single gushing flare. At best you're left with a cinder cone of wax and utter darkness. Other times you set the forest on fire, producing more light than is ideal for meditation.

Therefore, always keep your rushlight in view when you sit outdoors. I like to hang it just above and to one side of my field of vision in lotus. That way I can check it just by shifting my eyes.


A final note: there's a small trick to carrying one of these. If you just, like, carry it, the unshielded flame blinds you till all you see is it, surrounded by a giant doughnut of pitch black. If walking around with a tractor inner tube around your waist isn't your idea of safe navigation in a dark forest, turn your palm upward, slip your index finger through the loop in the bail, and carry it that way, hara-high. (See photo below.) That way your hand blocks the direct light, saving your eyes for the rest. For improved effect, carry something else in that hand as well, like a book or folded handkerchief.

In another post I've illuminated (sorry, couldn't resist) a cheap and easy method for making the candles that go inside. There are also plenty of storebought ones that fit. Just slide one in, whatever the provenance, and banish the darkness.

Not bad for stuff you were gonna throw out, eh?


(Adapted from 100 Days on the Mountain, copyright RK Henderson.)